

.png)

📷Let’s Talk Low Light: Shooting Nights, Stages, and Chaotic Gigs Without Losing Your Mind!
- Michi Masumi BA.MA
- 3 hours ago
- 5 min read

This blog covers everything you need to shoot confidently in low light—outdoor night scenes, theatre productions, and live music events.
It includes real camera settings, recommended lenses (like the 50mm f/1.8), a freelance prep checklist, and a step-by-step Lightroom editing workflow for noise reduction and colour fixes.
Written in an honest, beginner-friendly voice without the gear snobbery.
Alright, let’s be real for a second.
For the longest time, I thought low-light photography was just… broken. Like, the second the sun went down, my camera turned into a very expensive paperweight. Every shot was either a blurry mess (hello, shaky hands) or a grainy nightmare that looked like it was taken on a 2005 flip phone.
But then I fell in love with things that happen after dark.
Night streets.
Small theatre shows.
Sweaty live music venues.


...And I had to figure it out.
So here’s what I’ve learned—the non-technical, in-my-voice version.
📷 First: The Gear That Actually Helps
You don’t need a £2,000 camera. But you do need the right tool for the job.
Best lenses for low light (by budget):
🎯 Budget king: 50mm f/1.8 (aka “nifty "fifty")—around £100-180
🎯 Zoom flexibility: 24-70mm f/2.8 (pro workhorse, but pricey)
🎯 Wide & fast: 35mm f/1.4 or f/1.8 – great for tight venues and night streets
🎯 Telephoto for theatre: 85mm f/1.8 or 70-200mm f/2.8 (rent if you don’t own)

Why I’ve Trusted MPB for Over Six Years:
Affordable, Reliable Gear for Every Photographer
Building a photography kit can feel overwhelming, especially when you’re balancing creative ambition with a realistic budget. Over the past six years, MPB has become one of the most reliable parts of my workflow—not just as a marketplace, but as a trusted partner in sourcing second‑hand camera bodies and lenses that genuinely deliver. As someone who shoots portraits, still life, street photography, and documentary work, I need equipment that performs consistently without draining my resources. MPB has been the answer. Their grading system is transparent, their pricing is fair, and every item I’ve purchased has arrived exactly as described. No surprises, no hidden issues—just solid, dependable gear that lets me focus on the work.
What Makes MPB Stand Out?
Accurate product grading — Their condition ratings are honest, detailed, and consistent, which means you know exactly what you’re paying for.
Budget‑friendly options — Whether you’re a student, a hobbyist, or a working creative, you can find bodies and lenses that match your price range without compromising quality.
Sustainable choice — Buying second‑hand reduces waste and keeps high‑quality equipment in circulation.
Fast delivery and secure packaging — Every item I’ve ordered has arrived safely and ready to shoot.
A platform built for photographers — MPB understands how we work, what we need, and how quickly gear decisions can shape a project.
If you’re exploring your next upgrade or building your first kit, take a look at what’s currently available within your budget: mpb.com/en-uk
Learn Before You Buy: MPB’s YouTube Channel
MPB also runs a genuinely helpful YouTube channel packed with gear reviews, comparisons, and practical advice for photographers and filmmakers. Whether you’re trying to understand the difference between two lenses, looking for beginner‑friendly tips, or exploring new creative tools, their videos are a great place to start.
Explore their channel here: youtube.com/@mpbcom
Why This Matters for New and Emerging Photographers
For anyone starting—especially students, community creatives, or those navigating photography on a tight budget—the cost of equipment can be a barrier. MPB removes that barrier. You can build a professional‑quality kit gradually, affordably, and confidently, without sacrificing performance.
And for working photographers like me, MPB makes it possible to expand or refine your kit without the financial strain of buying everything brand new. It’s one of the reasons I’ve stayed loyal to them for more than six years.
My personal rule: If the lens doesn’t open to at least f/2.8, leave it at home after dark. You’ll thank me.
⚙️ Camera Settings That Save Your Bacon
Stop guessing. Start here:
Scene | Aperture (f/) | Shutter Speed | ISO | Focus Mode |
🌙 Night outdoor (still) | f/1.8 – f/2.8 | 1/60 – 1/125 | 800 – 3200 | Single-point AF |
🎭 Theatre (dim stage) | f/1.8 – f/2.8 | 1/160 – 1/320 | 1600 – 6400 | Continuous AF |
🎸 Live music (chaos) | f/1.8 – f/2.8 | 1/250 – 1/500 | 3200 – 12800 | Continuous AF + burst mode |
🚶 Night street (walking) | f/2 – f/2.8 | 1/125 – 1/250 | 1600 – 6400 | Single or zone AF |
Quick cheat:
If faces are blurry → raise shutter speed.
If too dark → raise ISO or open aperture.
If everything’s orange → check white balance (tungsten or auto).
And yeah, shoot RAW. Always. You can fix the noise and colour later. You can’t fix a JPEG that gave up.
🌙 1. Night Outdoor: Embrace the Grit
Walking around a city at night is pure magic. But your camera wants to scream.
My rule: Stop fighting the dark. Find one light source—a storefront, a streetlamp, or headlights—and use it like a spotlight.
Ditch auto mode. Pop into manual or aperture priority. Lean against a wall. Breathe.
And for the love of good photos: turn off your LCD screen preview after every shot. Trust your exposure meter. The blinking review kills your night vision and your flow.

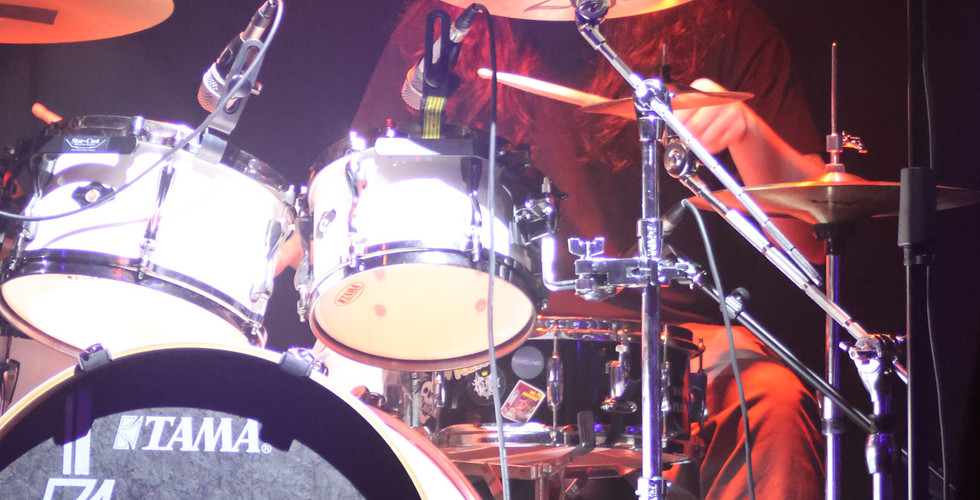
🎭 2. Theatre: You Are a Ninja (and That’s Good)
No flash. No stomping. Light changes every two seconds.
Mantra: Anticipate, don’t chase.
Watch actors for pauses—a dramatic breath, a slow turn. Crank that ISO (yes, to 6400+). Open your aperture. Shoot in bursts.
Pro theatre tip: Meter out the brightest face on stage. If you let the camera meter the dark background, everyone becomes a silhouette.

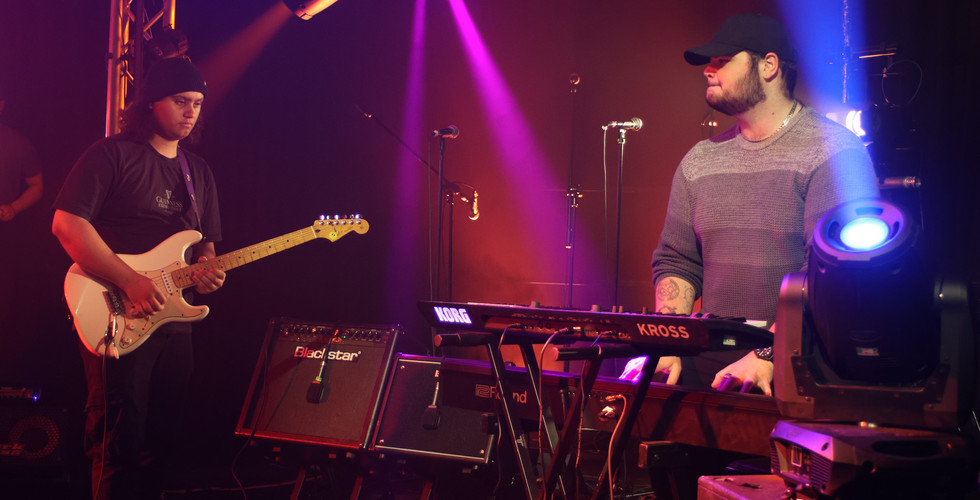
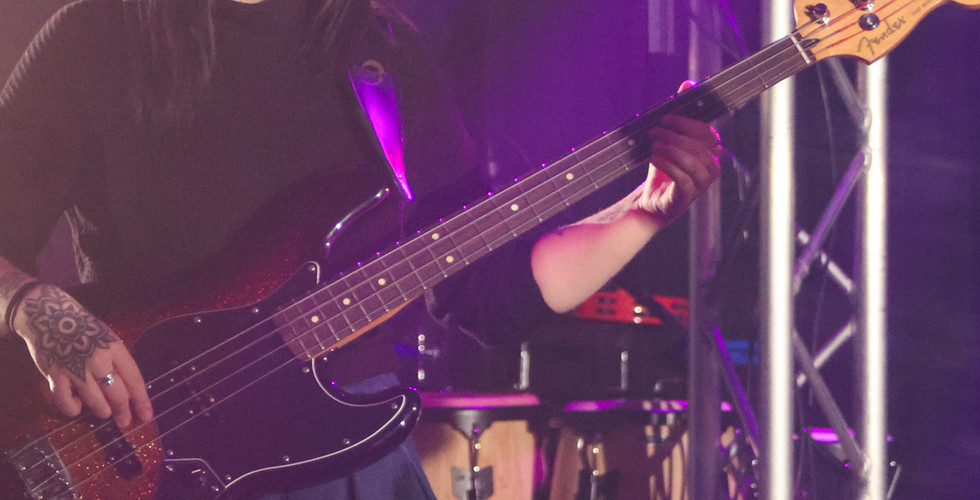
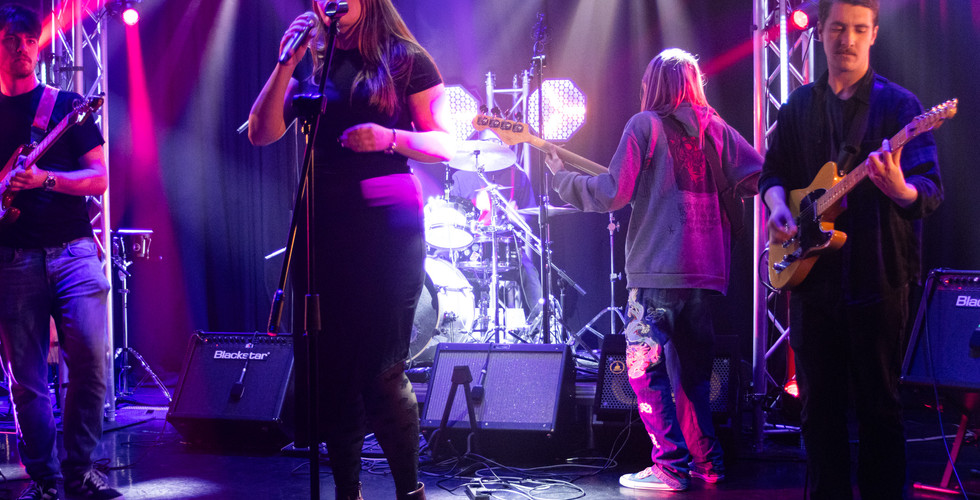
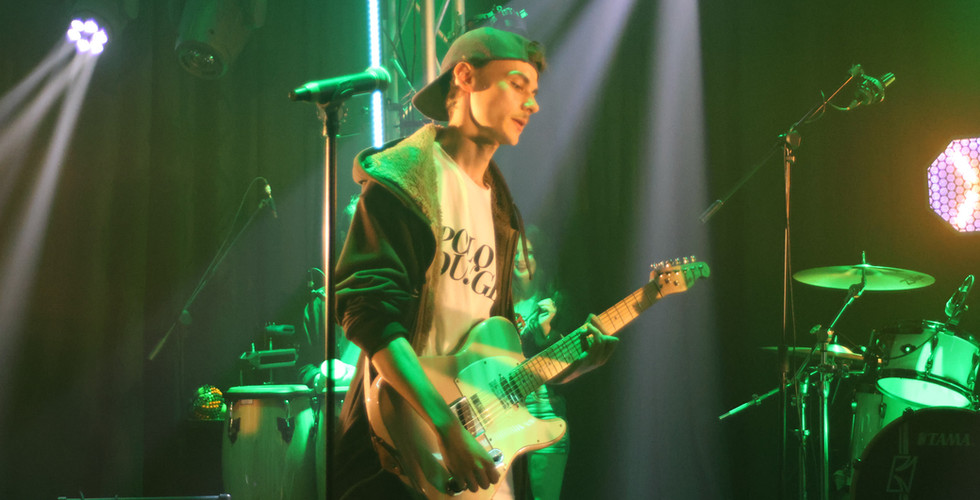
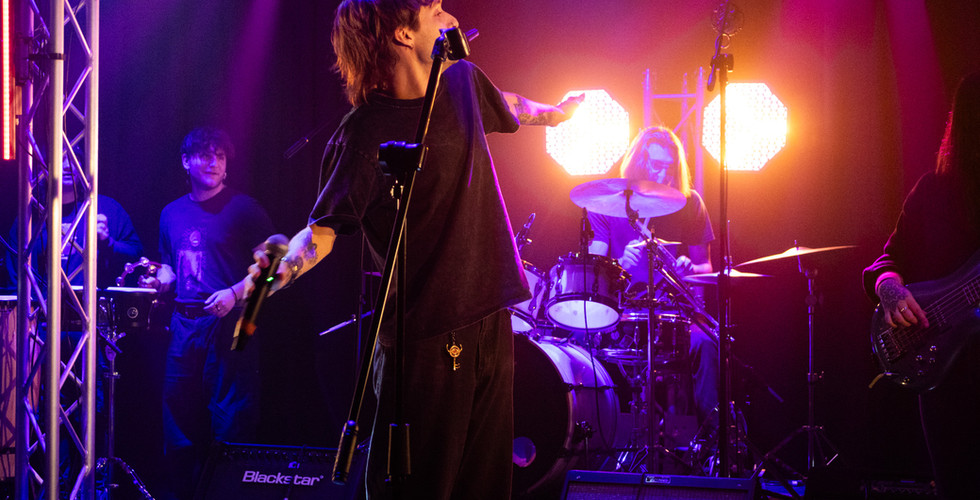
🎸 3. Live Music: Pure Chaos (Best Kind)
At first, I tried to freeze everything. Boring.
Now? I drop the shutter speed to 1/60 or 1/30. I pan with the singer. I let the background melt. The blur of a headbang is the music.
Spot meter on the face. Stage lights will trick your camera. Don’t let it.

🧰 Freelance Prep: Don’t Show Up Like a Rookie
I’ve learned this the hard way. Here’s your before-the-gig checklist:
📋 The night-before list:
Charge every battery. Then charge them again. Bring 2-3 extras.
Format your memory cards. Bring spares (I bring double what I think I need).
Clean your lens and sensor (gently).
Check venue rules: flash allowed? Camera policy? Earplugs?
Eat a real meal. Low light = slower reflexes. Hangry = blurry photos.
🎒 In your bag (freelance edition):
🪪 Business cards (give one to the venue manager or band)
🔦 Small flashlight or headlamp (for finding gear in the dark)
🧻 Lens cloth (sweaty venues fog glass fast)
🎧 Earplugs for music venues (you only get one set of ears)
📝 Small notebook + pen for shot lists, client names, or setlists
💰 One freelance golden rule: Always get the name of your contact. After the show, deliver 5-10 edited keepers within 24 hours. That’s how you get hired again.
🧠 The One Thing I Wish Someone Told Me Years Ago
You don’t need a full-frame monster.
You need patience and a little bit of guts.
A fast prime lens changed my life. But honestly?
The biggest upgrade was learning to see in the dark.
To stop panicking about noise.
To realise a slightly grainy photo of a genuine moment
is a million times better than a clean photo of nothing.
So go outside tonight.
Go to that dingy show.
Sit in the back row of a play.
Take the “bad” photos.
Some will suck.
Some will surprise you.
And the ones that work?
They’ll feel like magic.
Because that’s the secret: low light isn’t a problem to solve.
It’s an atmosphere to borrow.
Now shoot. And don’t forget to breathe.
Michi X


Comments